


Create new application
This page has been automatically translated using the Google Translate API services. We are working on improving texts. Thank you for your understanding and patience.
I consider myself a technical person who chose a great project and an excellent way to carry it out. Linus Torvalds.
In Build NAppGUI we have seen how to compile and package the SDK. Also, in Hello World!, we learned the basic structure of a NAppGUI-based application. The time has come to create our own applications, taking advantage of the CMake modules included in the /prj folder of the installation.
This chapter is focused on the use of CMake. If you use another build system in your projects, you will have to adapt the dependency management yourself.
1. Use of find_package()
NAppGUI supports the CMake find_package() command, so managing dependencies is extremely simple. It also provides a series of modules within the installation's /prj directory, which simplify project creation. Create a new folder and add this single file CMakeLists.txt:
1 2 3 4 5 6 7 |
cmake_minimum_required(VERSION 3.0)
project(NAppHello)
find_package(nappgui REQUIRED)
include("${NAPPGUI_ROOT_PATH}/prj/NAppProject.cmake")
include("${NAPPGUI_ROOT_PATH}/prj/NAppCompilers.cmake")
nap_config_compiler()
nap_project_desktop_app(napphello hello)
|
Important: Technically, the CMakeLists.txt of NAppGUI supports CMake since 3.0. However, CMake has a very strict minimum version policy and we may get an error that will force us to upload the minimum version.
1 2 3 4 5 6 7 8 |
CMake Error at CMakeLists.txt:1 (cmake_minimum_required): Compatibility with CMake < 3.5 has been removed from CMake. Update the VERSION argument <min> value. Or, use the <min>...<max> syntax to tell CMake that the project requires at least <min> but has been updated to work with policies introduced by <max> or earlier. Or, add -DCMAKE_POLICY_VERSION_MINIMUM=3.5 to try configuring anyway. |
We run CMake inside the new folder:
|
|
// Windows cmake -S . -B build -DCMAKE_PREFIX_PATH=C:/nappgui cmake --build build --config Debug // macOS cmake -G Xcode -S . -B build -DCMAKE_PREFIX_PATH=/usr/local/nappgui cmake --build build --config Debug // Linux cmake -S . -B build -DCMAKE_BUILD_TYPE=Debug -DCMAKE_PREFIX_PATH=/usr/local/nappgui cmake --build build |
For CMake versions lower than 3.13:
|
|
// Windows mkdir build & cd build cmake .. -DCMAKE_PREFIX_PATH=C:/nappgui cmake --build . --config Debug // macOS mkdir build ; cd build cmake .. -G Xcode -DCMAKE_PREFIX_PATH=/usr/local/nappgui cmake --build . --config Debug // Linux mkdir build ; cd build cmake .. -DCMAKE_BUILD_TYPE=Debug -DCMAKE_PREFIX_PATH=/usr/local/nappgui cmake --build . |
In the directory /build/Debug/bin you will have the napphello executable (Figure 1).
The find_package() command will search the directory specified in CMAKE_PREFIX_PATH. If you omit it, it will attempt to locate NAppGUI in the system folders.
2. NAppProject.cmake
The nap_project_desktop_app() function that we have used to create our application is located within the NAppProject.cmake module and will speed up certain aspects of the project (resources, dependencies, new files, etc). We open the Visual Studio solution that has been generated in /build (Figure 2).

NAppProject.cmake.|
|
nap_project_desktop_app(appName path) |
appName: The name of the application.path: Subdirectory where the project will be located (in this casehello). Any route depth is supported. For example:games/myapp,demo/games/myapp, etc.
The first time this function is executed, several things are done:
- A new directory
hellohas been created with a default desktop applicationnapphello.cand aCMakeLists.txt. - A folder
hello/reshas been created with an image, and it has been used as the application icon. In Resources we will continue to delve deeper into how to include images and texts in the application. - The newly created
hello/CMakeLists.txthas automatically linked to the NAppGUI binaries.
Successive calls to CMake will not overwrite the project files, so we can edit them without fear of losing the changes. Once the project is created, nap_project_desktop_app() will simply call add_subdirectory() to update changes. The nap_desktop_app() command in hello/CMakeLists.txt knows how to handle the quirks between different platforms. For example, in the case of macOS it will create a bundle instead of an isolated executable.
We don't have to limit ourselves to a single application. Our solution will support different targets. For example add this line to CMakeLists.txt and rerun cmake -S . -B build.
1 2 3 4 5 6 7 8 9 10 |
cmake_minimum_required(VERSION 3.0)
project(NAppHello)
find_package(nappgui REQUIRED)
include("${NAPPGUI_ROOT_PATH}/prj/NAppProject.cmake")
include("${NAPPGUI_ROOT_PATH}/prj/NAppCompilers.cmake")
nap_config_compiler()
nap_project_desktop_app(napphello hello)

# New project
nap_project_desktop_app(nappbye bye)
|
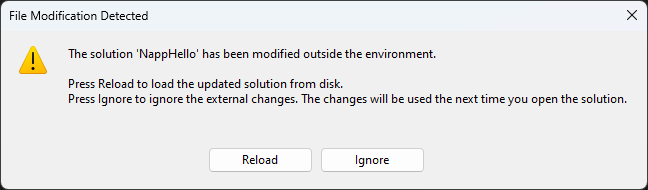
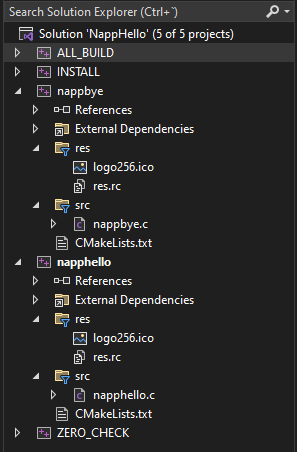
If the solution was already open, it is possible that the IDE will notify you that there have been changes (Figure 3). After pressing [Reload], you will see that the new project (Figure 4) has appeared.
nappbye project.3. Add files
Going back to the napphello project, we see that by default only one source code file (napphello.c) is created that contains the entire application. You will most likely want to split the code between different files. Create a pair of new files hello/myfunc.c and hello/myfunc.h from the IDE or directly from the browser. Open them and add these lines:
1 2 3 4 5 |
1 2 3 4 5 6 7 8 |
Open /hello/napphello.c and edit the i_OnButton function.
1 2 3 4 5 6 7 8 9 |
... static void i_OnButton(App *app, Event *e) { real32_t res = myadd_func(56.4f, 23.3f); textview_printf(app->text, "Button click (%d-%.2f)\n", app->clicks, res); app->clicks += 1; unref(e); } ... |
Re-generate the solution with cmake -S . -B build. The IDE, Visual Studio in this case, informs us again that there have been changes in the napphello project. Simply press [Reload All] as we did in the previous case.
Recompile and run napphello to see the changes you just made. You can create as many files and subfolders within the hello directory as you need to better organize your code. Always remember to run cmake -S . -B build every time you add or remove files from the project. The nap_desktop_app() command will update the solution by "cloning" the directory structure within the project (napphello in this case).
At this point we recommend that you spend some time researching, compiling and testing the examples in the demo folder within the NAppGUI repository.
4. Command line applications
Similar to the desktop applications seen above, it is possible to create console applications. Add this new line to the CMakeLists.txt of the solution.
1 2 3 4 5 6 7 8 9 10 11 |
cmake_minimum_required(VERSION 3.0)
project(NAppHello)
find_package(nappgui REQUIRED)
include("${NAPPGUI_ROOT_PATH}/prj/NAppProject.cmake")
include("${NAPPGUI_ROOT_PATH}/prj/NAppCompilers.cmake")
nap_config_compiler()
nap_project_desktop_app(napphello hello)
nap_project_desktop_app(nappbye bye)

# New project
nap_project_command_app(myutil utils/myutil)
|
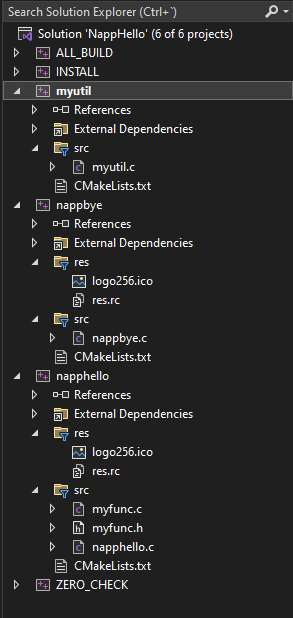
When regenerating the solution with cmake -S . -B build, Visual Studio will alert you again that you need to reload the solution. A new project will have been created in utils/myutil (Figure 5), but this time if you compile and run it no window will appear. You will only see a message in the Visual Studio console:
1 |
Hello world! |
If you open myutil.c you will find the code that generated the previous output:
1 2 3 4 5 6 7 8 9 10 11 12 13 |
/* NAppGUI Console Application */ #include <core/coreall.h> int main(int argc, char *argv[]) { unref(argc); unref(argv); core_start(); bstd_printf("Hello world!\n"); core_finish(); return 0; } |
Which is the typical template of a C program, to which the support of the core library has been included. From here, we can modify the code and compile. nap_command_app() already set everything up for us.
|
|
nap_project_command_app(appName path) |
appName: The name of the application.path: Relative path where the project will be located (in this caseutils/myutil).
It goes without saying that the behavior of nap_project_command_app() is identical to that of nap_project_desktop_app(). It will not overwrite the project files once created and will integrate all new files that we add in the future.
5. C/C++ standard
Compilers generally allow you to check that code conforms to certain C/C++ standards, issuing warnings or errors when it does not. For the sake of portability, all projects generated by nap_desktop_app() and nap_command_app() set the older standards (C90 and C++98 respectively). You may want to use more modern standards in your projects. Open hello/CMakeLists.txt and add these two lines:
1 2 3 4 5 6 |
nap_desktop_app(napphello "" NRC_NONE)
#-----
nap_target_c_standard(napphello 11)
nap_target_cxx_standard(napphello 14)
#-----
target_link_libraries(napphello ${NAPPGUI_LIBRARIES})
|
The nap_target_c_standard() command has set the C11 standard for napphello. Likewise, nap_target_cxx_standard() has selected C++14.
- C standard:
90,99,11,17y23. - C++ standard:
98,11,14,17,20,23y26.
If CMake or the compiler does not support the indicated standard, the most modern allowed will be established. It is the responsibility of the programmer to use the appropriate compilers for the chosen standard.