


Quick start
This page has been automatically translated using the Google Translate API services. We are working on improving texts. Thank you for your understanding and patience.
"...the number of UNIX installations has grown to 10, with more expected..." Dennis Ritchie and Ken Thompson - June 1972
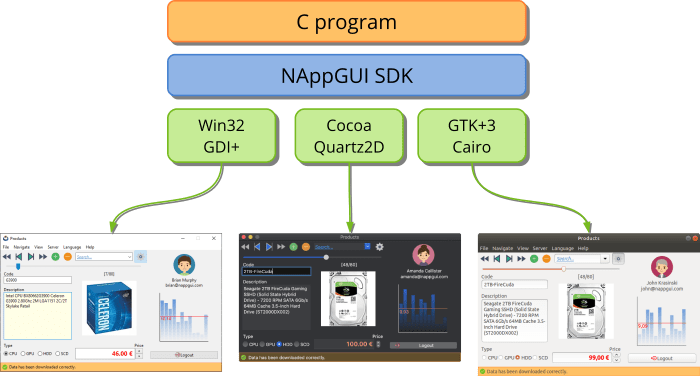
NAppGUI is an SDK to develop software projects, that work on any desktop platform (Windows, macOS or Linux), using the C programming language (Figure 1). C++ is allowed, but not indispensable. We can write a complete program using only ANSI-C.
1. Quick start in Windows
Before starting you need to have these tools installed (Figure 2):
- Visual Studio to compile under Windows. Microsoft offers the free Community version.
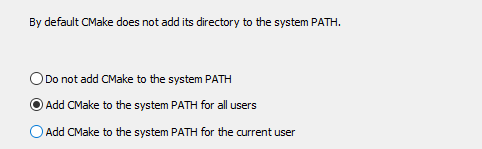
- CMake. Cross-platform tool to create compilation projects automatically, from source code. Be careful to select Add CMake to the system PATH for all users during installation (Figure 3).
- Git. For download the project from GitHub.

From a console on Windows:
|
|
git clone --depth 1 https://github.com/frang75/nappgui_src.git cd nappgui_src cmake -S . -B build cmake --build build --config Debug |
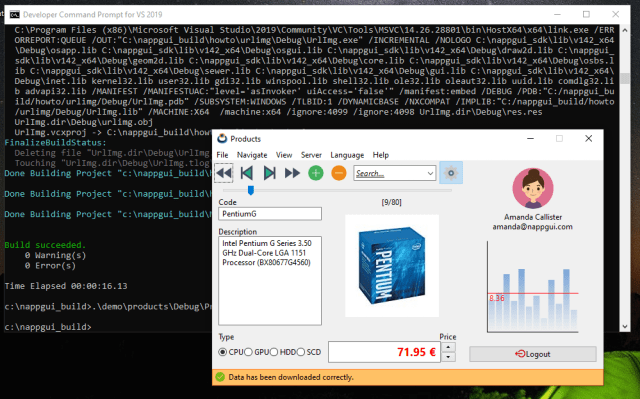
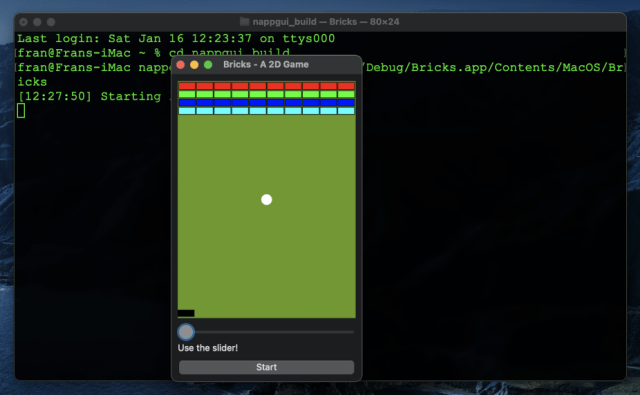
Once compiled, you will be able to run the existing example applications in the \build\Debug\bin directory (Figure 4).
|
|
.\build\Debug\bin\Die.exe .\build\Debug\bin\Bricks.exe .\build\Debug\bin\Products.exe .\build\Debug\bin\Col2dHello.exe .\build\Debug\bin\GuiHello.exe ... |
2. Quick start on macOS
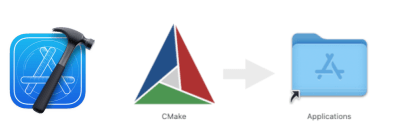
Before starting, make sure you have installed and configured Xcode, an essential environment for development under macOS. You will also need to download and install CMake from www.cmake.org (Figure 5).
By default, CMake does not configure command line access on macOS. You can create symbolic links with sudo "/Applications/CMake.app/Contents/bin/cmake-gui" --install.
Open a terminal in macOS:
|
|
git clone --depth 1 https://github.com/frang75/nappgui_src.git cd nappgui_src cmake -G Xcode -S . -B build cmake --build build --config Debug |
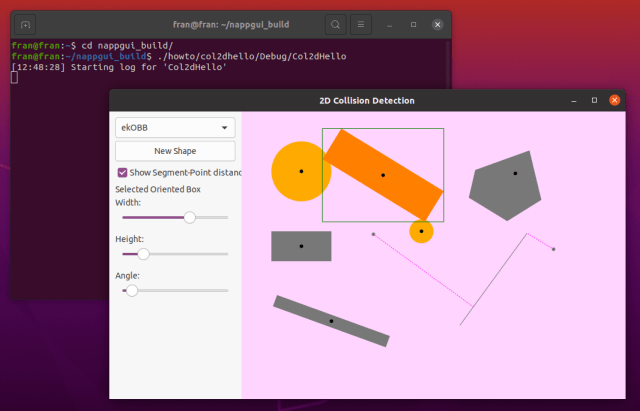
Once compiled, you can run the existing sample applications in the /build/Debug/bin directory (Figure 6).
1 2 3 4 5 6 |
./build/Debug/bin/Die.app/Contents/MacOS/Die ./build/Debug/bin/Bricks.app/Contents/MacOS/Bricks ./build/Debug/bin/Products.app/Contents/MacOS/Products ./build/Debug/bin/Col2dHello.app/Contents/MacOS/Col2dHello ./build/Debug/bin/GuiHello.app/Contents/MacOS/GuiHello ... |
3. Quick start on Linux
Before starting, make sure you have the necessary compilers, tools and libraries installed:
|
|
// Development tools sudo apt-get install build-essential sudo apt-get install git sudo apt-get install cmake // Development libraries (*) sudo apt-get install libgtk-3-dev // Mandatory Gui Toolkit sudo apt-get install libcurl4-openssl-dev // For HTTP support sudo apt-get install libwebkit2gtk-4.1-dev // For WebView support sudo apt-get install mesa-common-dev libglu1-mesa-dev libegl1-mesa-dev // For OpenGL support |
(*) Explicitly installing these libraries is only necessary on machines that are going to compile applications based on NAppGUI. To run the applications it is not necessary to install anything, since the production versions of these libraries are found naturally in most Linux distributions.
Open a terminal:
|
|
git clone --depth 1 https://github.com/frang75/nappgui_src.git cd nappgui_src cmake -S . -B build -DCMAKE_BUILD_TYPE=Debug cmake --build build -j 4 |
Once compiled, you will be able to launch the existing example applications in the /build/Debug/bin directory (Figure 7).
|
|
./build/Debug/bin/Die ./build/Debug/bin/Bricks ./build/Debug/bin/Products ./build/Debug/bin/Col2dHello ./build/Debug/bin/GuiHello ... |
4. MIT License
NAppGUI is distributed under the MIT license, which essentially means that you have complete freedom to use this software freely and for free, both in commercial and free projects. The only restriction is that you must include a copy of this License in every substantial part of the software you distribute.
5. Previous knowledge
This book is not intended for beginners. Although the NAppGUI project is aimed at simplifying the construction of cross-platform applications, it requires certain prior knowledge on the part of the user. You will need, at least, to be fluent in C or C++ since at no time we will stop to explain basic programming concepts. If you come from Java or C#, you should review pointers. You will also need some skill with Visual Studio and Xcode development environments, and Unix tools such as gcc, make or the command interpreter.
On the other hand, if you are an advanced user, you will find a simple system to create very fast and small C applications that will compile without changes in all desktop environments. You will also have at your disposal a set of precompiled C libraries to create user interfaces or command line applications, without the need to mess up your projects with the cumbersome class templates that stl or boost provide.
6. And now what?
- In Welcome to NAppGUI we continue with the tutorial.
- In Hello World! we see the minimal code of a desktop application.
- In Build NAppGUI we see how to compile and install NAppGUI.
- In Create new application you will start creating your own applications.
- In NAppGUI API you have the documentation of the libraries and functions.
- In Products you have the source code of a medium-sized application.